Showing posts with label Tips and Tricks. Show all posts
Showing posts with label Tips and Tricks. Show all posts
Sunday, November 10, 2013

Wednesday, October 30, 2013
Beyond Excited: The Toronto IMATS

Aside from the pesky Canadian winter, the dark mornings and early evenings, and winter preparations I am excited because the IMATS are coming back to Toronto!
The IMATS stands for International Makeup Artist Trade show and will be hosted by the Metro Toronto Convention centre November 9th & 10th 2013!
This trade show is the bomb.com for not only makeup artists but makeup enthusiasts such as myself.
The trade show allows you to shop for makeup brands that are hard to find on the ground, introduces new innovative brands that are coming out, see top makeup artists speak and lend advice on getting started in the industry, as well as get discounted makeup from some of the biggest companies of beauty.
The IMATS are very exciting, I have been 2 years in a row and enjoyed the atmosphere and learning about my favourite subject: Beauty
IMATS are in other major cities such as New York, LA, London, Vancouver and Sydney and each carry different vendors lines so check your local listings if you are in any of those areas.

Just some pointers if you plan on attending IMATS this year or in the future:
- Purchase your tickets on IMATS website! Unfortunately I already missed the early bird special, however I will be getting the next batch of tickets. Paying at the door is more costly and the event could sell out as well. When you purchase online it also saves you a lot of time at the event and allows you to get your IMAT experience popping ASAP! (Whoop whooooppp)
- Go to the Saturday show if possible and arrive EARLY. You know what they say: early bird catches the worm, and that ain't a lie. The earlier you come the more you can look around peacefully (for a bit) you can get your hands on the hottest items (which tend to get sold out quickly) and you can navigate your way a bit more peacefully through the vendors.
- Visit the big vendors first! OCC, Mac Pro, Makeup Forever etc sell out the quickest, and have the craziest lines. Also bring a list because it cuts down on the time you stand there deciding on what products you wish to have.
- Also bring Cash (plenty of it) there is no interact, and very little vendors have credit card terminals! Remember it is a trade show (they operate like the olden days people) Last year I brought some cash and had to go hunt down a bank outside and wasn't impressed!
- Bring your camera! There are cool exhibits, models in the makeup competition, and you may bump into some cool personalities. Last year I met TheQueenOfBlending from YouTube. I love her and have been following her for years!!
- Wear comfy shoes, a light jacket, and take a small purse! This isn't the club or a fashion show ladies and gentleman. Yes your face should be BEAT. However your 8 inch stilettos will get played out hour one in the Crown Brush line. Your thick winter jacket will have you getting heat exhaustion, and your huge purse will feel like weight after hours. Dress wisely. Cute and comfy I say!
- Take a list of the booths you wish to see ( it can get so overwhelming once you are inside) and jot down the times of the seminars and classes you want to see. (Waiting in line for 45 minutes for eyeshadow and missing a key speaker is very annoying trust me)
- Tissue, makeup wipes, mirrors, and hand sanitizer is also good since you will be swatching products and trying to make quick decisions.
- Have fun! Network, talk to people, participate in seminars, see as many vendors as possible. Take in the experience
Tuesday, October 29, 2013
Tuesday, October 1, 2013
Sunday, September 8, 2013
To Splurge Or to Save? Drug Store Cosmetics vs High End Cosmetics
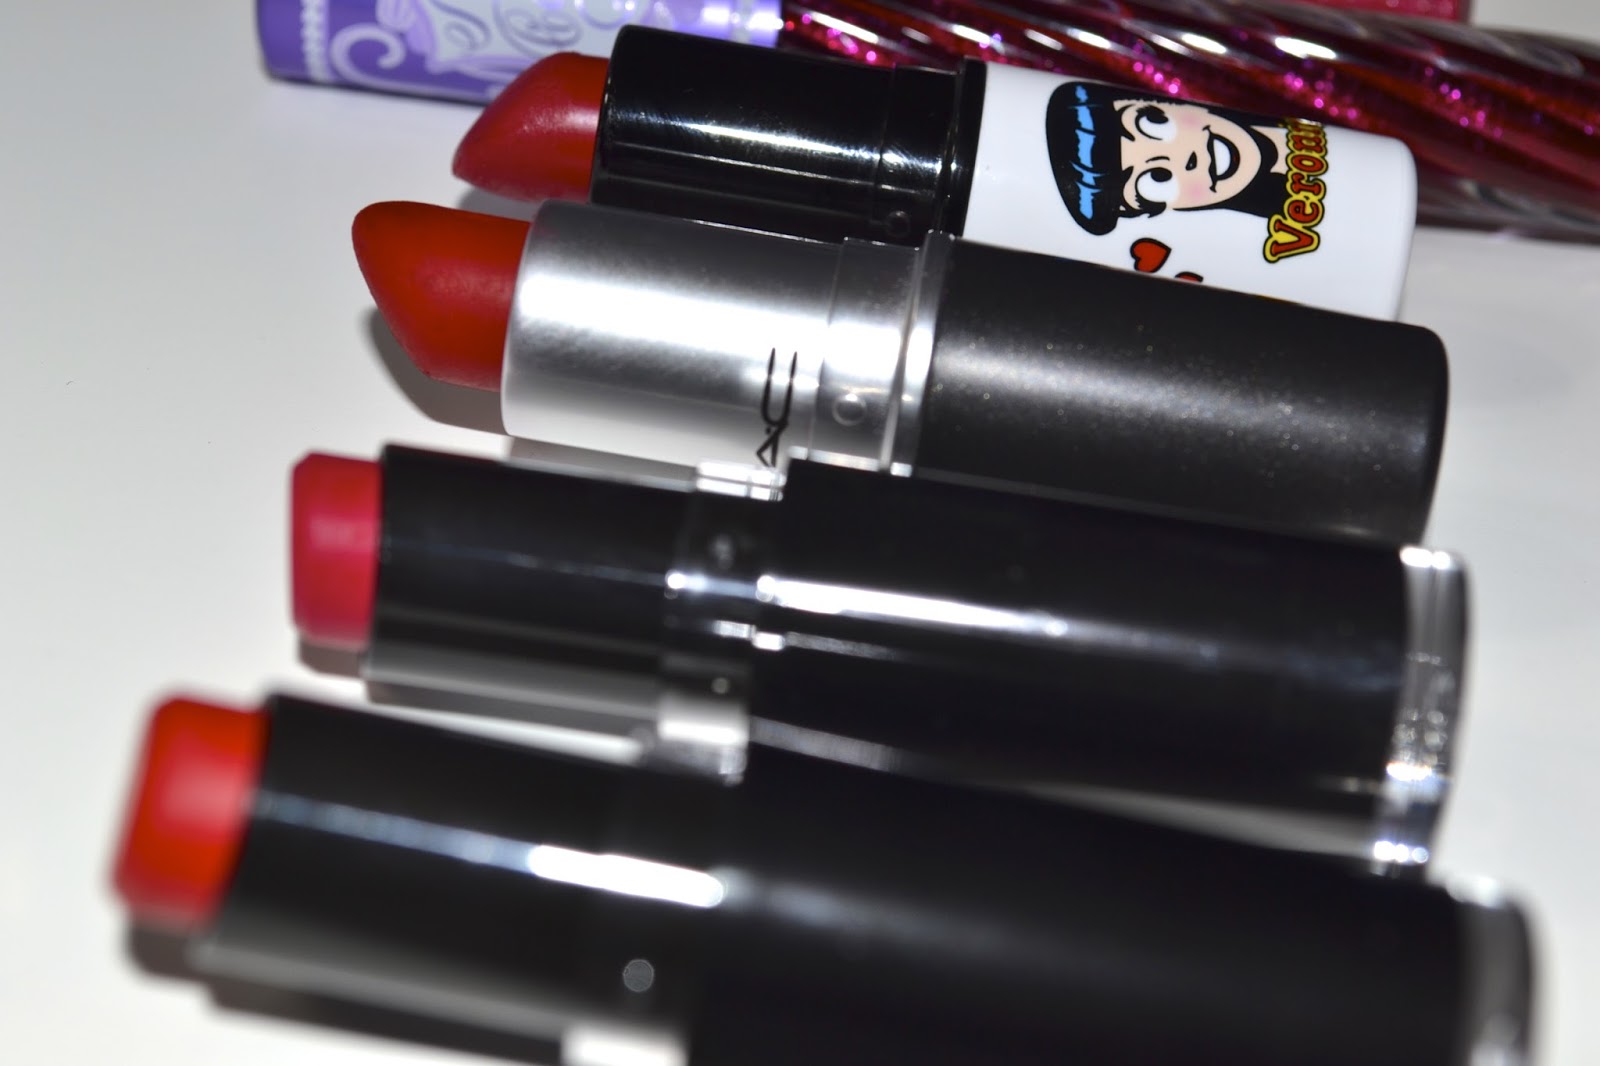
I do however like to save my money when I get a chance and I feel there are many companies both lower end and high end that are comparable.
In truth the drug store has stepped up HEAVY on the quality, shade range, and availability of makeup at very reasonable prices.
I have a mixture of both Drug store makeup (Revlon, Maybelline etc), mid ranged makeup (MAC, Urban Decay, etc) High End (Dior,YSL, etc) and I can honestly say there are some misses and hits in all spectrum's of brands and there are still products within each range that I can not see myself shelling out the extra dough for.

You do get what you pay for in a lot of instances but there are budget friendly brands that offer great products for less and some products that you may have to cringe and squeeze out some extra coin for best results.
Products to Save on:
- Mascara- Mascara expires the quickest of any cosmetic (2-4 months yikes) so to shell out 25+ on a high end brand I just can't bear. I have personally had the best experiences with drug stores brands such as Cover Girl, L'oreal, and Maybelline that I never plan to shell out wads of cash again on this product.

- Nail Polish: Nail polish has a short shelf life (12 months- mine go LONGER lol) so for me its hard to shell out the 20+ for a Nars or Dior nail polish. The fact is I usually use it a few times and then I am bored and onto the next colour pretty quickly. Drug store brands keep on trend with colours and change their collections faster then you can blink! Brands I personally love are Sally Hansen, OPI, Essie and Revlon.


- Lip gloss: I remember the days of cheap lip glosses leaving that ugly white film, being way to tacky and sticky, and not delivering the gloss and shine I was looking for. Not anymore drug stores have stepped up their game and quality and there are lip glosses that are equally as comparable to their higher end counterparts of surpass them to me. Brands such as Revlon, Victoria Secret, and NYX have great consistency, lasting power, and colour ranges and can really save your some dollars.
- Lip Stick: I know I am going to come across as a little hypocrite because I personally do own a lot of higher end lipsticks. However I will say lipsticks are the one cosmetic that is often imitated, and duplicated very well by many drug stores in terms of colours, consistency, and quality. Brands such as Wet & Wild, Revlon, and Rimmel make some outstanding lipsticks and they cost 1/4 the price of many brands on the market. There are so many dupes of higher end colours and the options are endless. Although I love my higher end lipsticks I feel this is a area that can be saved on if you are budget conscious.


- Make up Remover/ Make up Wipes: I used to shell out money for MAC makeup wipes (they work great no lie) but for me to dump 20+ on some wipes that are going into the trash became silly to me and I started looking at drug store options. Brands such as Oil of Olay, Neutrogena, and Nivea have some great makeup remover wipes as well as gels that do the job just the same. I also have used baby wipes when I am pressed and I must admit they work quite well. Make sure if you go this route to get the sensitive wipes.
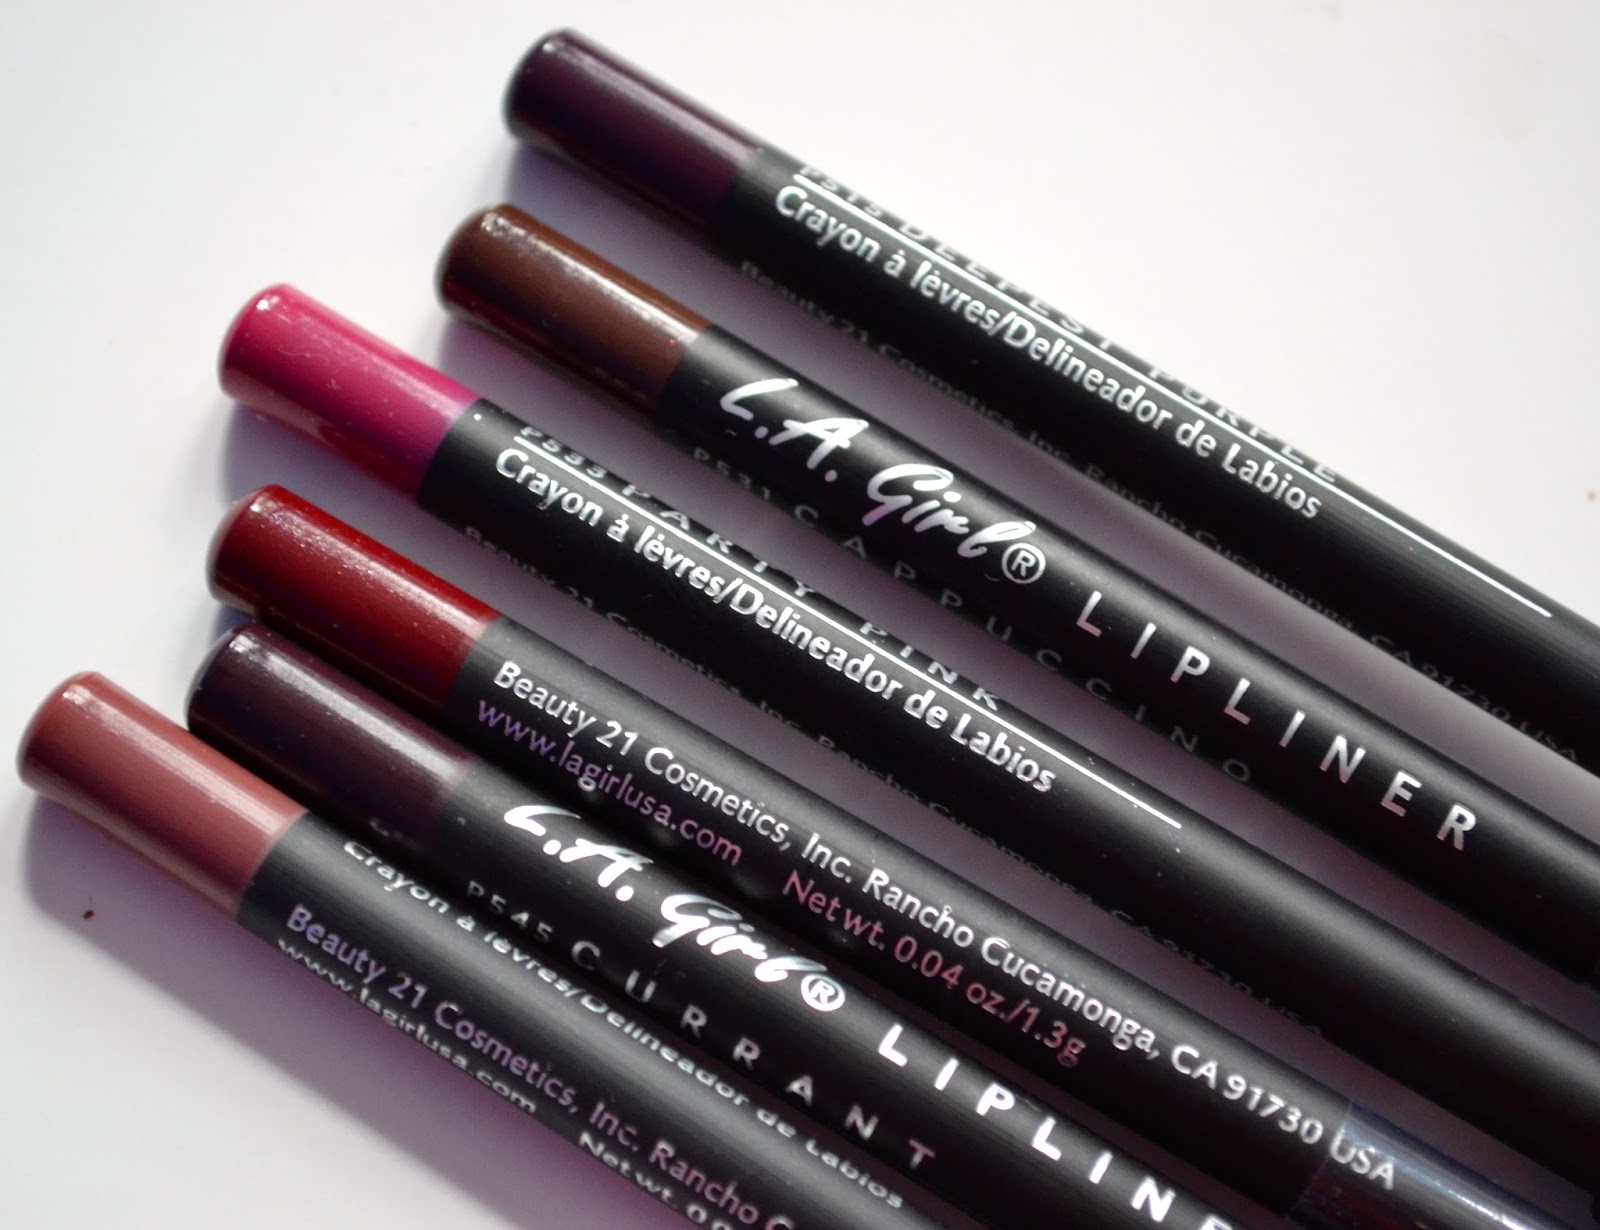
- Lip Liners: Lip liners are another great product to save on. Between sharpening them down to the ground, and the many different colour options that can be purchased inexpensively, as well as the quality, lip liners can be purchased right at the drug store to save you 20+ dollars and allow you to even purchase an additional lipstick with the savings. Brands with great lip liners are NYX, Rimmel, LA Girl and Jordana.
Products to Shell out extra Coin on:
- Eyeliners: Whether it be liquid liner, pencil liner, or gel liner I personally belief you may want to shell out a few more coins! To get eyeliners that last all day, don't smudge on the waterline, or crack and feather on the eye you are going to need to get brands that have lasting power. Also because these products are sitting on your precious eyes I would get a decent brand with decent ingredients. Brands to consider are MAC, Stila, Tarte, etc. There is nothing worse then perfect makeup and raccoon eyes.


- Eyes Shadow: Eye shadow is another cosmetic I believe you should go mid range on. I personally find some of the mid ranged brands such as Urban Decay, MAC, and Kat Von D have shadows that are smooth, easy to blend, and are so pigmented. Although some drug store brands have good ones I personally have found that nothing tops the longevity I get out of mid range brand and consistency.
- Blush: Blush really has to suit your skin tone, and blend seamlessly into your skin to prevent looking like a clown. Drug store blushes tend to be more limited in the ranges and tones, so I tend to spend the extra coin for a decent blush that will enhance my face and help me look radiant. Brands to consider are: MAC, Makeup Forever, and Sephora.


- Bronzer/Illuminators: There is nothing worst then a bronzer with chunky glitter, or an illuminator that doesn't blend seamlessly into the skin to provide a glow (a fake glow) from within. Mid range bronzers and Illuminators generally come in a wider variety in terms of colour and suit a wider range of skin tone's minus the look of a glittery mess. Mid range brands tend to have bronzers that are finely milled also. Brands to consider are: Bare Minerals, The Balm, and Smashbox.
- Powder/ Setting Powder: If you are a foundation, BB cream, or tinted moisturizer wearer powder is what you need to lock and set you look so that it doesn't slip and slide off your face throughout the day. I think investing in a powder that doesn't make you appear cakey, suits your skin tone/colour and looks natural is essential. Due to the lack of shade ranges that still are apparent within drug store brands I would say better to invest a little more in a mid range product to ensure you get a product that suits you. Also setting powder is a crucial step when applying concealer. If you don't want your bags to be popping finding a setting powder that doesn't make you look like you got hit with powder. Brands to consider: Cover FX, Tarte, and NARS.

- Eye Shadow Primer: If you live in a hot climate, have oil eye lids, or are going to be attending a special occasion/ event and need your eyeshadow to stay on your face versus your under eye, investing in a eye shadow primer that is decent will really save you a lot of headache. I personally recommend trying Urban Decay, NARS, Two Faced, as well as MAC (paint pots, or paints). They may seem like overkill on the wallet but you only need small amount and this product lasts for a very long time.

Products to Splurge on
- Foundation: Foundation is the top cosmetic I feel should be splurged on period. I would say to aim for the highest end that you can afford. Now I know some will disagree depending on what shade but the truth is higher end brands tend to have many different shade ranges, undertone offerings, and quality that many drug stores simply have not matched. Foundation is the one cosmetic that is crucial to get as close to your actual skin as possible. Most people use foundation to even out skin tone, cover blemishes, and enhance the face. The wrong colour, wrong type ( IE: matte for dry skin, dewy for oily skin, etc) can really make or break how your overall face looks and your overall happiness with your makeup. With that said depending on your colour (very pale, very dark, and everything else in between) it is crucial to find something that is going to work well for your personal needs. There are so many brands that can be listed here as options to look into but I will name a few I have always heard as hits and brands that I personally love. Brands include: Makeup forever, Nars, Bobbi Brown, Dior, Lancome, YSL, Tarte, Fashion Fair, Cover FX, Estee Lauder, etc.

- Concealer: Concealer is another product you should save up some coin for and get the best you can afford. Similar to foundation having a concealer that matches your undertones and skin tone is crucial in making concealer mask dark under eyes, dark spots, and well as using it for highlight and contour. Brands that last through sweat, heat, and different skin issues can make or break your happiness with a concealer. Brands to consider: Kevyn Aucoin, Nars, Bobbi Brown, Josie Maran, Makeup Forever, etc.

- Primer: Primer can lengthen the wear of your makeup as well as help for smooth application of foundation on the face. Since it is the base in prep to makeup application and creates a barrier between your skin and your makeup I believe this is a product that needs to be high quality and contain beneficial ingredients. Brands to consider: Tarte, Hourglass, Smashbox, Korres, etc.

Now remember these are only my personal opinions and guidelines but I say it is best to invest in the makeup you wear the most, the issues that are crucial for you to disguise, as well as stick to your personal needs.
Sunday, June 9, 2013
Gold Digger: MAC Strobe Cream Golden Elixer

Mac does have a permanent strobe cream that is available but it has a pink/pearl shimmer to it that tends to look ashy on tanned or darker skin, and also has a thick lotion like consistency that makes it a little harder to blend. This new strobe elixir has a thinner watery consistency and is more suitable for people that have tanned or darker skin tones because it plays up on the golden attributes of the skin. This elixir may appear a little scary looking at it in the bottle but when applied to the skin it is easily blend-able and leaves skin with a natural radiance that makes skin look like it has been sun kissed.
The formula for this strobe cream is light weigh on the skin and a golden- brown warm natural shimmer on the skin.
 I purchased this product at the MAC store and was lucky I got it all together because they have been selling out like hotcakes. The price is bit steep at $40 CAD but contains 40 ml of product so that will last for a very long time since you only need one or two pumps maximum. This product is a great product that can be used in several different ways.
I participated in the Temperature rising application in store and the artist placed it on my skin and it looked great and lasted for the evening.
It can be mixed into moisturizer, foundation, or can be dabbed directly on the cheekbones.
When mixed into foundation it is important to powder your t-zone if you have combination or oily skin because it can look greasy potentially.
I like that this bottle has a pump that locks for easy application and allows for mess free application.
If your interested in this product I say act fast because they are limited edition. This strobe lotion can be purchased at all MAC counters and on MAC's website.
Sunday, April 14, 2013
In home nails and feet Tools Pt 2: Helpers are a MUST
So in my previous post we have covered some of the tools needed to fix the mess of winter on both feet and hands but there are still a few more tools you will have to add to your arsenal to guarantee a flawless salon look from the comfort of your home. The trick of the game is constant maintenance. Every couple days in the shower it is a good idea to scrub your feet and body to rid of the dead skin that has been lurking since winter and continue to to be added daily. These tools are inexpensive and can be found in nearly any store.


Nail polish Remover: Nail polish remover with acetone gets rid of glitter, dark colours on nails, and leaves nails feeling soft and strong. Grab a bottle of good nail polish remover to help you with any mistakes. Beauty Secrets Acetone: Sally Beauty Supply $5.99 CAD
Cotton Rounds: 100% cotton rounds are used to take off nail polish, stubborn glitter, clean up the nail, or correct any mistakes. (Doubles up as eye makeup remover) Cotton: Wal-Mart $1.00 CAD
Nail File: A nail file is used to shape nails, soften edges, and make nails appear neat. They are also very helpful if you break a nail because will file down the nail and make it appear uniform with the others. Sephora $1.99 CAD
Nail Buffer: Helps to remove any ridges from nails, shine nails, and provides smooth texture for nail polish upon application. Sally's Beauty Supply $1.99 CAD
Foaming Body Buff: Body buff helps remove dead skin cells off the body, off the bottom of soles, and exfoliate the skin leaving it polished. Thick crystallized exfoliates leave feet smooth and soft and sandal ready. Bath and Body Works $22.00 CAD

True Blue Spa Super Rich Body cream: Shea butter enriched cream that is thick, rich and leaves body and feet feelings smooth and nourished. No more ashy feet ladies this cream does some wonders. Bath and Body Works: $20.00 CAD
True Blue Spa Shea Cashmere: A body cream that is also infused with Shea butter, cashmere extract and silk proteins apply to cracked heels and soles for a smooth and sexy feeling and scent. Bath and Body works $17.50 CAD
Let's get those feet Sandle Ready and Hands Cute Pt 1: Tips and Tricks
There is nothing worse then seeing a woman wearing sandals and her feet are ashy, crusty, and stark white. As the weather is getting nicer and boots get put away in place of open toe shoes and sandals it is like the eight wonder in the world to me that while strapping on the shoe it is okay for some to look like they been through a desert or have walked on hot coal for hours.
Please ladies beware of this before we get into that season full fledged and help your feet and nails out. Getting a pedicure is not in every ones budget (shoot it ain't in mine) so I set myself up at home to get things right. The winter can reek havoc on the feet and skin but there are few inexpensive tools you can use to rectify the situation and not become a statistic.
Nail Clippers: A stainless steel clipper that is small enough to carry in your beauty bag or purse and cuts the nails down with precision. Also comes with a fold away file to clean under the nails safely. Trim along the natural nail line and don't cut nail too low into the nail bed.
Revlon $3.99 CAD Wal-mart, or any drugstore internationally.
Nail Groomer: A stainless steel cuticle groomer pushes back the cuticle on the nail and cleans under nails as well. Soaking hands or feet in warm soapy water is best prior to use.
Sephora $3.00 CAD, or any drugstore internationally.
Cuticle Scissors: A stainless steel cuticle scissor helps cut cuticles and hangnails. A curved blade allows for precision and ease when using. It is also a good idea to soak feet or hands in soapy water to soften skin before cutting.
Beauty Supply Store $1.00 CAD, or any drugstore internationally.
Nail Dotter: A stainless steel nail dotter is a helpful tool if you like to get the pedicure designs minus the price tag. Allows for dotting of nail polish on hands and feet and can help create designs.
There are many design video's on YouTube you can get ideas and instructions, take a look!
Sephora $3.00 CAD Sephora Sale or any drugstore internationally.
Toe Separators: Rubber toe separators that separate feet during nail polish application. Prevents toes from touching and smudging together, and provides salon like perfection.
Sally's Beauty Supply $.99 CAD or any drugstore internationally.
Conditioning Cuticle Oil: Conditioning cuticle oil helps fight dry cuticles and prevent hangnails from forming on the fingers or toes. Essie Smooth Trick conditioning oils are loaded with vitamin A & E and nourish dry brittle nails.
Essie $8.00 CAD Wal-mart or any drugstore internationally.
Lacquer Drying Drops: Drops that are applied to nails after top coat is applied and dries nails completely within less then a minute. Helps when you are in a rush and can't wait around. OPI comes with a dropper that can be placed on nail to prevent streaking or mess.
OPI $8.00 CAD Beauty supply stores or any drugstore internationally.
Base Coat: A base applied to nails before nail polish Create smooth base for nail polish application and prolongs the wear of nail polish. Don't think you need it? Try using a good one it helps a lot.
OPI $7.99 CAD Beauty supply stores, nail shops, and Amazon.
Top Coat: Adds gloss and shine to the nails as well as seals in nail polish and prolongs wear. A good top coat is the key to longer lasting nails.
OPI $7.99 CAD Beauty supply stores, nail shops, Amazon.
Foot Buffer: Foot buffer removes dead skin cells off the feet, smoothes down rough patches on soles and toes, and helps feet feel buttery soft.
Winners, Marshalls, Target $5.99 CAD

Please ladies beware of this before we get into that season full fledged and help your feet and nails out. Getting a pedicure is not in every ones budget (shoot it ain't in mine) so I set myself up at home to get things right. The winter can reek havoc on the feet and skin but there are few inexpensive tools you can use to rectify the situation and not become a statistic.
 |
| Top to Bottom: Revlon Nail clippers, Sally's Beauty supply toe separator Sephora Cuticle Pusher, Cuticle Scissors, Sephora Nail Dotter, OPI Drip Dry, Essie Smooth Trick,OPI Base Coat, OPI Top Coat |
Revlon $3.99 CAD Wal-mart, or any drugstore internationally.
Nail Groomer: A stainless steel cuticle groomer pushes back the cuticle on the nail and cleans under nails as well. Soaking hands or feet in warm soapy water is best prior to use.
Sephora $3.00 CAD, or any drugstore internationally.
Cuticle Scissors: A stainless steel cuticle scissor helps cut cuticles and hangnails. A curved blade allows for precision and ease when using. It is also a good idea to soak feet or hands in soapy water to soften skin before cutting.
Beauty Supply Store $1.00 CAD, or any drugstore internationally.
Nail Dotter: A stainless steel nail dotter is a helpful tool if you like to get the pedicure designs minus the price tag. Allows for dotting of nail polish on hands and feet and can help create designs.
There are many design video's on YouTube you can get ideas and instructions, take a look!
Sephora $3.00 CAD Sephora Sale or any drugstore internationally.
Toe Separators: Rubber toe separators that separate feet during nail polish application. Prevents toes from touching and smudging together, and provides salon like perfection.
Sally's Beauty Supply $.99 CAD or any drugstore internationally.
Conditioning Cuticle Oil: Conditioning cuticle oil helps fight dry cuticles and prevent hangnails from forming on the fingers or toes. Essie Smooth Trick conditioning oils are loaded with vitamin A & E and nourish dry brittle nails.
Essie $8.00 CAD Wal-mart or any drugstore internationally.
Lacquer Drying Drops: Drops that are applied to nails after top coat is applied and dries nails completely within less then a minute. Helps when you are in a rush and can't wait around. OPI comes with a dropper that can be placed on nail to prevent streaking or mess.
OPI $8.00 CAD Beauty supply stores or any drugstore internationally.
Base Coat: A base applied to nails before nail polish Create smooth base for nail polish application and prolongs the wear of nail polish. Don't think you need it? Try using a good one it helps a lot.
OPI $7.99 CAD Beauty supply stores, nail shops, and Amazon.
Top Coat: Adds gloss and shine to the nails as well as seals in nail polish and prolongs wear. A good top coat is the key to longer lasting nails.
OPI $7.99 CAD Beauty supply stores, nail shops, Amazon.
Foot Buffer: Foot buffer removes dead skin cells off the feet, smoothes down rough patches on soles and toes, and helps feet feel buttery soft.
Winners, Marshalls, Target $5.99 CAD

Thursday, April 11, 2013
Back to Basics: Coconut Oil and the many Benefits and Uses
 |
| Dr Bronner's Magic All in one Fair Trade Organic Coconut Oil |
Coconut oil is my holy grail item because it is jam packed with so many benefits and is truly a underrated inexpensive product that is full of greatness. I will go over some of the many uses and benefits of coconut oil when added to a beauty regiment.
Uses and Benefits in Hair
- A great conditioner for the hair when applied as a pre- poo (overnight before wash time)
- Great hot oil treatment for dry damaged hair
- Helps rid of dandruff and dry scalp
- Promotes hair growth
- Makes hair soft and shine
- Helps treat damaged hair
- Can also get rid of lice
I must say that I have been using coconut oil to deep condition with for the last two years and see tremendous amount of growth, shine, and strength in my hair. This is the one product I will never remove from my hair journey because it is inexpensive and works really great.
I do not recommend leaving it in for more then 10 + hours in your hair because your hair will be extremely greasy and start to smell. A good idea is to deep condition and wear it to bed or while doing some housework and wash it out.
Uses and Benefits on Skin
- Great moisturizer for the skin
- Is said to aid in the prevention of wrinkles, age spots, and fine lines
- Relieves irritations like sun burns of insect bites
- Softens skin and provides a natural glow
- Treats chapped, dry lips in the harsh winter time
- Has no side effects, is natural, and organic with no added ingredients
When using coconut oil on the skin you really start to feel the texture of your skin get so buttery soft and radiant right away. It is great to use it on the legs after you shave, on your skin before you go into hot weather, as well as use as a massage oil. All the lotions and gels of the world don't compare to the feeling of using coconut oil on the body but just be careful to use a little at a time.
What to look for when Buying Coconut Oil
- Certified organic and non-GMO
- Made from fresh coconuts
- Unrefined
- Chemical-free
- Unbleached
- Maintains pure white color
- Unhydrogenated
- Has a fresh coconut fragrance
- Cold pressed (the way the oil is extracted from the coconut)
I have two brands of Coconut oil that I use: Dr. Bronner's Organic White Virgin Coconut Oil or Nutiva Organic Virgin Coconut Oil. Both work great and I have no complaints. However I do prefer Nutiva for a few reasons. Nutiva can be found at most grocery stores(so easier to purchase) and has a smoother consistency. Whereas Dr Bronner although very good has a slightly graining consistency Both are great products and are worth checking out and using non the less.
Nutiva retails for $12.99 CAD (depending on size you get)
Dr Bronners retails for $8.99 CAD
Sunday, April 7, 2013
Smooth Operator: Lush Grease Lightening Tea Tree Cleanser

I used to get a lot of pimples and acne on my face as a teen, which I will blame on puberty and adolescence more so then anything, but when I got to about 17 or 18 I stopped getting pimples all together. The rare time I would get a pimple it was big, red, and painful but would soon disappear as long as I kept my hands off my face and ignored it.
Now with the use of cosmetics and old age it seems that when pimples do pop up they are acne style blemishes and take much longer to go away. Due to a reaction of a new foundation I tried my face broke out on my cheeks, my chin, and my hairline. I stepped into the Lush store and was talking to a representative about getting a face mask and she informed me about Lush Grease Lightening cleanser. I was hardly interested in the product because I was dead set on getting the face masks I read about but read the ingredient list and thought I will try and see if it works for me. I arrived home and started looking up blogs and getting feedback from the beauty world and saw a lot of positive comments written about the product and started to use it.
Grease Lightening Tea Tree Cleanser is a clear gel that contains thyme, rosemary, tea tree oil, organic aloe-vera extract, sea water, grape juice, lavender oil, and which hazel! I know that's some crazy blend of ingredients but all very healthy and have proven track records.
I was told that I could use this to cleanse my face, to use as a base to rid of oil prior to application of makeup, and matte the face. I use this as a spot treatment when one of these eruptions invade my face. I cleanse, tone, and moisturize my face and then apply this treatment directly to my blemish and go to bed. It works very well surprisingly and literally it reduces the spot by miles or rids of it all together. Tea tree is very powerful and does wonders! The ingredients are great and an organic product you can't ask for more. This comes in a tiny bottle but it really lasts forever (though has a shorter shelf life- due to organic ingredients used) but really is packed with value as a vegan product. It retails in Lush for $13.95 and I think it is definitely worth a try.
Get a sample and give it a try!

Thursday, April 4, 2013
My Little Helpers: A few Tools that make Beauty Life a bit easier
So I have been reviewing items left, right and center, but I feel like I am forgetting to mention some of the contributing helpers on the team that aid in some quick fixes and glitches when dealing with beauty. Most of the items I will present can double up as multifunctional tools and really save me when I am in a jam. These are some of my top tools I reach for on a given day, and I feel they should be essentials in your makeup bag or kit.


- Eyelash/Brow Comb: This is a tool I reach for on a daily basis. It aids in combing out my eyebrow hair prior to shaping or grooming. The other end helps me comb out my eyelash hair, and remove clumps from mascara when applied. Duo Lash Comb/Brow Brush- $9.50 CAD.
- Tweezer: This is self explanatory but tweezers help take out stray eyebrows as well as remove the odd facial hair that may appear on the face (I know who gets those?), also help with application of false lashes. Revlon Slanted Tweezers $6.99 CAD.
- Mini scissors: These scissors serve as multi purpose use. Can trim facial hair, nose hair, eye brow hair, split cuticles, andear hair you name it! Tweezerman $20 CAD.

- Shiseido Facial cotton pads: Help with removing makeup, applying toner, removing nail polish, and applying liquid makeup products as well. These cotton are 100% natural cotton and may seem overpriced but apply smoothly to the face and leave no lint after use. $9.00 CAD.

- Q-tips Precision Tips: These are are the best! They aid in cleaning up mistakes around the eye gently with makeup remover, allow for makeup application to brows, and eye shadows (when you forget your brushes), clean up bleeding of lipsticks or mistakes made during application, clean up nail polish around brims of finger, remove nail polish from fingers (when you forgot your cotton pads) as well as clean around jewellery on the face (nose Piercing, eyebrow perices etc) $2.99 CAD

- Mac Fix +: A mineral and vitamin infused product that helps mist dry skin prior to makeup application, add dew after makeup application, set makeup after powder has been applied, mix with loose pigments to appear more vibrant on the eyes or face, refresh makeup and the face after a long day. $25 CAD
Wednesday, April 3, 2013
Bling-Bling: Hard Candy Glow all the way- Glamazon Bronze

Alright so I’m sure you are tired of me going on and on about the spring time and summer time. I feel like if I talk about it enough or dress for it will come sooner. I always like the look I have when I am coming back from a tropical place. You know when your skin looks sun drenched and you have this beautiful radiant glow from Vitamin D. Your body has this beautiful color to it, you look awake and energized? I am a sucker for that. Summer time I want that glow minus the $800 vacation. That is where Hard Candy comes in.
Hard Candy has this amazing product called Flow all day that provides a light shimmer to the body. Hard candy bronzer can be added to your foundation or tinted moisturizer to add some bronze to your product. Use just a dab of it because it can be very glittery if too much is added. Just a small dabb of it really makes a huge difference in the appearance of your foundation. It can also double as a bronzer with a pea sized added to your cheek bones or over blush. I tend to use it on my shoulders when I wear a tank top of tube top, my chest area to highlight, and also all over my legs when I wear shorts or a skirt. It is important to apply it after you have applied your clothing and let it dry prior to moving around (or it will get on everything)


I went on the hunt for this exact shade called Glamazon Bronze as I figured it would be the most complimentary. Hard candy has 2 other shades that will suit woman with lighter skin tones perfectly. As I read up on the product woman with lighter skin tones suggest this has self tanner within it but I have never seen any darkening of the skin on me (though I am dark already) So if you are lighter do keep that I mind in terms of your application just in case. This product is perfect to carry on vacation because it is in a tube and provides a light glimmer all over. This claims to be infused with 24-carat gold in it as well. The product has a light sweet scent to it that is not offensive and of really great value! You can find this face and body luminizer in Wal-Mart or other drug stores and is $6.99 each!
Tuesday, April 2, 2013
All Set-Ready-Go: Mac Prep + Prime Transparent Finishing Powder
 |
| Mac Prep + Prime Transparent Finishing Powder |
Lately I have been getting a lot of questions in regards to foundation, the right products to use as well as some tips on how to combat some of the issues that arise. I tell ladies, try this foundation I heard it works, try wearing a primer under, try a matte formulation, etc. In all of my inquiries I have been getting I for some reason forget to tell them the trick of the trade and why my makeup tends to stay in place. Finishing Powder!
Now for me I stumbled into this product one day because I hated the idea of applying a powder that added more color to my skin and then made me appear cakey. I wanted a product that would just set my foundation, or tined moisturizer, and concealer in place. Essentially "Freeze" the hard work I have done (Beating my face to the gods).
Essentially what a finishing powder does is set your make up in place, reduce the appearance of pores on the face, fill in lines and imperfections on the face and reduce some shine to the face. Now all say that and I will agree with most of the above statements except that I still see some pores and imperfections just the same.
Mac's prep and prime sets your makeup and allows for a transparent finish on the skin. I have heard woman complain that it leaves a white cast to the face with flash photography and I have yet to notice. Some even say that they have a white cast on the face the moment they have applied this product but I feel this means too much of the product has been used. Just a bit applied to the cap a swept onto a fluffy powder brush and dusted over the face is more then enough needed.
When using a under eye concealer just press a bit of it onto your brush or sponge and press it onto the under eye.
 |
| Mac Prep + Prime Transparent Finishing Powder |
Sunday, March 31, 2013
Wearing Red Lipstick: Tips and Tricks

- First and foremost please (if you follow anything I mention please let this be it) always exfoliate your lips! That I would say as a lipstick junkie is the biggest rule of them all. There is nothing worse then seeing chapped, crusty, uneven lips attempt to put on a lip color, especially a bright lip color on top. (http://nopainnobeauty.blogspot.ca/2013/03/lush-bubblegum-lip-scrub-review.html)
- Now that we have outlined the most important step next would be to get a very moisturizing lip-balm that really will help with any problems of chapped lips. Carmex, cocoa butter, Fresh sugar, vaseline any of those do the job and really aid with a smooth application of the lipstick. I suggest applying after exfoliating but before placing lipstick on blot some of the balm off with a tissue so that the lipstick doesn't slide off your lips.
- Another big tip is the lipliner you are using. Lipliner can tone down a lip color or provide a seamless blend from your lip color and the lipstick color and can really help a lipstick appear much nicer on the lips. Dark brown, burgundy, eggplant, or a dark red lipliner really help and go well with any red under the red spectrum.
- Applying red lipsticks (or darker lipsticks) can be a messy task and sometimes discourages woman from wearing them all together! Applying with a lip-brush provides a lot more control and minimizes the mess that tends to be created applying the lipstick out the tube
- Also cleaning up any mistakes made around the mouth with concealer helps
- Another trick is putting your pointer finger in your mouth (that removes any lipstick under the brim of your lips so that you are not stuck with red lipstick on your teeth)
- Practice makes perfect! Try different liners and applications but don't give up. Blue based lipsticks tend to suit woman with darker skin tones. For woman with lighter skin tones pink based lipsticks and blue based lipsticks also are very nice.


Subscribe to:
Posts (Atom)
Subscribe To


 Posts
All Comments
Posts
All Comments